What is Bikepacking?
Bikepacking is a new form of travel that is growing in popularity in recent years. It involves riding a bicycle over mixed terrain and over multiple days. It evokes the freedom of backcountry hiking and travel off the beaten path but with the added range, quicker pace, and thrill of riding a nimble bicycle.
Bikepackers carry their belongings either on their back in a backpack while they ride, or most commonly they attach their gear to their bike frame in specifically designed bikepacking bags, which allows for longer distance to be travelled and more comfort for the rider.
Bikepacking involves carrying the essential gear—and not much more—on an off-road-capable bike for an overnight or multi-day ride. That could range from a full load with sleeping gear, a cooking kit, and food for camping to a minimal kit with just the clothing and supplies you need to link shelters or hotels.
The surfaces used on most bikepacking routes range from smooth gravel to rugged singletrack and from rutted dirt roads to purpose-made cycle paths. Bikepacking routes commonly incorporate a variety of mixed surfaces linked via paved backroads, towns, byways, and rail trails. The beauty of off-road cycling is that it can take on many interesting forms.
All too often, the image of mountain biking is portrayed with speed, aggressive riding, and destroying land, not savoring it. Bikepacking is all about slowly moving through the landscapes and appreciating your surroundings in a respectable and appreciative way. The ethos of ‘Leave No Trace’ is echoed amongst bikepackers.
It’s all about pedaling further into places less traveled, both near and far, via singletrack trails, gravel, and forgotten dirt roads, and connecting with the vast landscapes, welcoming people, and diverse places encountered along the way.
How Bikepacking Came About
The term bikepacking was first used in the May 1973 article ‘Bikepacking Across Alaska and Canada’ in National Geographic magazine, where the writer Dan Burden described 30 cyclists who had a go on the Hemistour Bicycling Expedition from Alaska to Argentina. The packaging was described as consisting of side-mounted panniers, handlebar bags and whatever could be fitted on the luggage carrier. Backpacks were not relevant since they were concerned with long-distance cycling, and a backpack can become bothersome after a couple tens of kilometers.
In the 1980s, bikepacking races became popular in Alaska, which are long-distance touring races where the riders cycle with all necessary equipment on their own and are self-supported. An example of such a race was the 320 km (200 mile) long IditaBike race (playing on the name of the famous Iditarod long-distance sled dog race) which was started by Joe Redington Sr. Out of 26 people, which started on what were common mountain bikes at the time, 13 finished.
Few understand bikepacking as well as James Olsen, (James Olsen’s interview on bikepacking), the founder of the Torino-Nice Rally that covers 700km of mountainous gravel roads on the France-Italy border, and also the designer behind Pinnacle bikes.
He first loaded up a mountain bike with bags for ‘lightweight off-road touring’ in 2003, moving on to riding with a bivvy bag and wild camping in 2010. He says that “[Bikepacking] has always existed, but lately companies have started to share a lot more inspiring imagery, and now people are interested,” he said.

Gear Needed For Bikepacking
Bikepacking Bikes
Whilst luggage, tents, and other equipment might all be individually light, when combined the mass is likely to be notable and the frame needs to carry all of this across bumpy terrain. A slightly heavier, more robust frame is always better than a cracked frame.
The best bike frame style will depend upon your aims and the routes you plan to take. A mountain bike will handle more demanding trails, but those aiming for speed and confidence that the bike won’t hold them back on their chosen trails, should maybe look down the route of an adventure road bike, gravel bike or cyclocross bike. If the route permits it, don’t rule out a road bike.
Nowadays, a gravel bike is often the preferred option for bikepacking and the best bikes for bikepacking will allow you to load up and ride a variety of surfaces.
More important considerations for a bikepacker planning to take most of their ride into the wild are the off-road ready elements of the frame – wide tyres, luggage mounting options, disc brake compatibility and mud clearance.
The best bike for you depends on your ride. If you want to do Transcontinental – get a road bike. If you just want to explore off-road then a mountain bike is best.
Drop handlebars, narrow tyres, they’re great bikes for a day trip – but as soon as you start loading the bike down with 5-6kg of luggage bigger tyres are really important.
Look for bigger tyres than you expect you will need; 650b wheels are good as all of a sudden the bike becomes so much more off-road capable under load.
When it comes to componentry, you might want to choose lower gearing to cater for long distances and the added weight of your equipment. Choices like flared handlebars on drop-bar bikes can make a considerable difference to how much you can store in a handlebar bag.
And of course, if you’re going to be in the saddle multiple days on end, a comfortable saddle is a must. Don’t underestimate this.
Bikepacking Bags
When cycle touring, panniers are the order of the day for most riders – but the way they alter weight distribution can mean they’re not ideal for off-road bikepacking. What’s more, they widen the overall load so that narrow trails can become an issue. You’ll also need a rack or set of racks to attach them to.
More popular choices are strap-on bikepacking bags, including frame bags, which sit in the front triangle, seatpost bags which attach to the seatpost, effectively like a very large saddlebag, and handlebar bags at the front. Then additional bags like top tube bags, snack pouches and fork-mounted bags can all give additional storage options.
Bikepacking bags are designed to be strapped to your bike and, unlike most pannier racks, don’t require specific mounting points on your frame, so can be used with just about any bike.
Bikepacking bags range greatly in price from entry-level options to premium waterproof, robust and custom designs. Don’t feel you need to invest in the best to get started, nor splash out on a full matching set – a handlebar bag and saddle bag will likely give you enough capacity for the bikepacking essentials.
If you’re on a tight budget, a waterproof drybag lashed to the handlebars using bungee cords or voile straps can work well.

Bikepacking Sleeping Systems
So you’ve got your luggage options sorted – but what to pack? And how to carry it?
When it comes to sleeping, you can take a lightweight tent, a bivvy bag or a hammock, plus a tarp for the latter two in worse weather.
Remember that different situations require different sleeping solutions. If you are going for fast and light, the bivvy is your best bet. If you have to deal with midges, long evenings, bad weather, I’d take the weight penalty and carry a tent.
Olsen has a lightweight tent but rarely uses it: “It depends on the conditions; there’s no answer to what’s best. But for me part of the pleasure of the experience is just appreciating being outside in a sleeping bag in a sheltered spot – and being able to wake up and see the stars.
“Being shut up in a tent wouldn’t be a part of what I enjoy. But if I was going out in bad weather with midges, there’s no way I’d do that without a tent – though a bivvy bag and a lightweight tarp might be easier.”
Other Bikepacking Essentials
Though you may be able to ride to a bike shop should you experience major problems, you’ll need to carry tools and spares to maintain and care for your bike, especially if you’re heading into more remote areas.
Some spares to remember include inner tubes (whether you’re set up tubeless or not), a puncture repair kit, chain quick link and a spare mech hanger for your bike. Don’t forget extra chain lube and some electrical tape, too. Oh, and a few cable ties might just become your best friend.
Bike lights, a GPS computer, and a charging system such as a battery pack or even low speed specific dynamo hubs are other things to consider too.
If you’re into documenting your trips, the best bike and helmet cameras like GoPros and Insta360s will allow you to capture some great footage.
There are quite a lot of ‘pack lists’ available online which can help provide inspiration
It’s also worth stashing a handful of spare bolts in case a bottle cage or any luggage rattles loose. The same applies for cleat bolts if you expect to do lots of hike-a-biking.
A lightweight bike lock is also a sensible addition, to secure your bike at a campsite or if popping into a shop.
Without access to electricity overnight, it’s a good idea to take a fully charged battery pack with you, so you can recharge items such as your phone, GPS device, lights and camera.
It’s always a good idea to let someone know where you’re heading and when you anticipate being back, especially if you’re riding solo. Some of the best cycling apps offer tracking functionality so your loved ones can make sure you’re safe.
Bikepacking Personal Hygiene
Never underestimate the importance of basic hygiene – even on a bikepacking trip. A travel-size tube of toothpaste and small toothbrush will help to keep your teeth happy after the inevitable sugary energy snacks.
Sunscreen and insect repellent are both small but very important additions to your kit list that you shouldn’t overlook, as well as lip balm (SPF options come in handy) for sunnier, windier conditions.
It’s also really important to try to keep yourself clean and dry ‘down there’ to avoid any skin irritation or saddle sores. Take off your shorts as soon as you finish riding and switch into clean, casual clothing, then use a clean pair of shorts the next day or clean and dry the original pair if you can.
How to Pack For Bikepacking
Packing for a bikepacking trip is part art, part science.
When you’re loading up your backpacking bags, it’s important to try to keep the weight low and central.
Heavy kit placed high on the bike or disproportionately over the rear wheel will affect your balance – something that’s particularly important if you’re heading off-road. It also makes any out-of-saddle efforts harder.
With the largest bikepacking bag typically being a saddle pack, that’s easier said than done, but consider where you may be able to place heavier items. For example, if your bike has additional bottle cage mounts underneath the down tube, you can use these for a tool keg.
A separate tool pack will also mean that your tools are close at hand if you have to fix a mechanical issue– preferable to having to rummage in the depths of a saddle pack or bar bag.
Items of protective clothing such as waterproofs also need to be close at hand for when you need them, as do things such as sunscreen and snacks, so keep them at the top of bags or pack them in a frame bag.
A bento bag, strapped or mounted to the top of the top tube, or canister bag on the handlebar, can also help keep ride essentials at hand.
Kit that you’ll only need occasionally, or at the end of the day, can be packed further down in your bags, for when you’ve got more time to pull everything out and reorder it.
Also make sure that items such as a down jacket, spare clothing and sleeping kit, especially a sleeping bag, are somewhere waterproof; there’s nothing more miserable than a night trying to sleep in a cold wet bag.
It’s worth having a waterproof dry bag to be doubly sure they’ll stay dry, rather than relying just on the bike bag’s waterproofing.

How To Plan a Bikepacking Trip
With your bike sorted and ready to go, here’s how you should plan your trip to get the most out of your venture out into the wild. Here is some tips for your next bikepacking trip.
1. Plan your route
A route-planning app such as Komoot can help you find out a lot of information about your trip before you leave. Kamoot allows you to use the planner to build a multi-day course, seek inspiration from user-generated highlights or browse Komoot’s ‘collections’, which contain pre-established routes.
There are a huge number of established bikepacking routes across the world, which you could tap into for your first bikepacking ride. Or you could plot your own route closer to home.
Don’t feel you have to try anything too extreme on your first go – you can still learn a lot by travelling relatively short distances and taking on the challenges of carrying gear, setting up camp and cooking for yourself for the first time.
Double check your planned route to make sure it’s suitable for the type of bike you’re planning on riding, and the current weather conditions. For example, avoid river crossings after heavy rainfall and high ground if there’s any chance of thunderstorms.
If you’re not passing through many towns or villages along the route, make sure you take plenty of snacks and water with you. Alternatively, plan your resupply points in advance: you won’t want to go hungry.
2. Take a sleeping kit dry run
Make sure you’re comfortable using all of your sleeping kit.
It’s a smart idea to do a dry-run of your kit setup at home before your trip, to make sure you understand how to use it.
New tent? Pitch it in the living room or garden for practice, and you can double check that you have all the pegs and poles too.
If you think you might encounter some rainfall overnight, a tarp can help keep the worst of the rain off your bivvy or hammock. Practise stringing up a tarp in your garden or local park to make sure you have everything you need and are familiar with how it works before you have to try setting it up in a downpour.
It’s worth checking local laws about wild camping if that’s something you intend to do, or alternatively book into a campsite or other place to stay. If you plan on staying in a hotel, always make sure you have a back-up plan, because when you arrive you could find that it’s shut or full.
3. Pack light (ish)
You’ll be surprised how much you can fit into relatively small bikepacking bags.
As you haul your laden bike up a rocky, steep hill, you’ll realise just why packing light is important. However, that comes with a massive caveat: you shouldn’t pack so light that you omit key pieces of kit that could save you in an emergency, or if the weather turns on you.
It’s always a good idea to carry a survival blanket, small first aid kit (and know how to use it effectively) and enough warm and waterproof layers, as well as spares and tools of course.
As you gain experience bikepacking, you’ll learn what kit works for you and what isn’t necessary.
Yes, you’ll probably be surprised by just how little you do need to get by, but it’s important to always remember that heading out into remote areas puts more pressure on you to be self-sufficient and safe.
Pack light, but not too light.
4. Learn from the experience
You’ll soon work out what does and doesn’t work for you in different scenarios.
Once you’ve got your first bikepacking trip under your belt, reflect on your experiences.
What worked and what didn’t? Which items were really useful and which didn’t you touch? What gear did your friends use and did it work for them? Which parts of the route were enjoyable, and what would you change for next time? How did that sleeping arrangement work for you?
Just like any sport or skill, practice helps you learn what works best for you and when.
5. Enjoy it!
Enjoy the experience!
Heading out into the wild can be daunting, challenging and outright tough at times. Embrace everything that the elements throw at you, the views and the nature around you.
Consider inviting some more experienced pals along, who can help to show you the ropes, and be there for moral support if things get tough.
Stop to take pictures to remember your trip, draw sketches, savour local delicacies and watch the stars from the comfort of your sleeping bag.
Above all, bikepacking is supposed to be fun. Take your time, savour the experience and enjoy yourself!

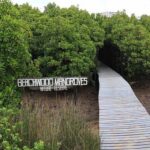
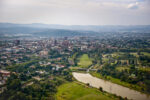
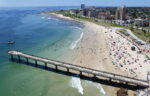
Bikepacking in South Africa
South Africa is an absolutely beautiful country with such a variety of landscapes to see. However bikepacking here is not the same as bikepacking the U.S or Europe. All South Africans are aware: crime is a very real thing here.
This makes bikepacking in South Africa a little bit trickier but I don’t think this should put you off the endeavor all together.
As long as you plan your route well, avoid cycling after dark and end your daily rides at a campsite, hotel or AirBnB, you should be alright.
I found a reddit page that talks about bikepacking in South Africa where I have pulled some comments from. Opinions are varied about bikepacking in SA with a lot of people leaning to the side of nervous caution.
I personally will not let these opinions sway me and plan on doing many bikepacking trips in South Africa in the near future, one of the firsts being along The Garden Route, a beautiful stretch which follows the east coastline up from Cape Town.
My advise to you. “Don’t be ruled by fear, but be cautious and plan properly.”
Some comments from the reddit post:
– ‘As a cyclist, SA has great topography and wildlife to cycle in & around. And it is 100% worth it to stay in an area, cycle at a local nature reserve and then move on to the next place, rinse and repeat. But bikepacking across the country as a tourist is a no-go. If you knew the temperaments of the cars, the people and the terrain, then maybe.
Nonetheless, you’d get just as decent an experience cycling in each province separately and individually. Having lived in a few different area’s in the country, I’ve experienced the beauty and individuality of each region. Durban (‘Sugar Rush’ as my local favourite) has the warm, moist, beautiful tropics. Kloof to Drakensberg has lush scenic hills and dense forestry/single track in cold fresh air. Pretoria has many smaller great nature reserves that allow you to cycle amongst various wildlife (zebra, buck, giraffe, birds) and hosts a drier climate with rockier terrain. Although i havent cycled there personally, the cape has one of the most attractive landscapes and climates in the country. Each has their own distinct beauty, and province hopping would be a great experience.’
– ‘Apart from crime making this an obvious no go, foreigners and even South-Africans really under estimate the size of South Africa. SA twice as large as Ukraine. Mpumalanga is twice as large as Netherland. That’s one of the reasons we don’t have public transport. Our cities were built horizontal not vertical like European cities.’
– ‘There are a lot of extreme responses here because people are worried that someone used to Europe won’t be able to deal with the conditions. That may or may not be true. I’ve done a fair bit of cycle touring, including in South Africa. You can definitely do it, but it’s not going to be The experience you’d have in Europe.
Probably the easiest and best bang for buck would be a week or two cycling around the Cape Peninsula, and maybe East down the coast a day or two towards hermanus – beautiful views, not great bike infrastructure but people do cycle all around there regularly. Beyond that I’d be looking at long distance tourer blogs to see if it’s something you’d want to sign up for. This is probably not the best place to ask because there is much less cycle culture in SA and most people will think you’re nuts:) hope it’s a good trip whatever you do!’
Bikepacking is a new form of adventure travel that is gaining in popularity. It is a cheap and easy way to see the beauty of the world at a leisurely pace. There is no set way to do it. You can go for as short or as long as you want. Heck, people have even gone around the world on a bike. Whatever your preference, you are sure to have an epic story at the end of it.
Have you ever done a bikepacking trip. What was it like? Let us know about your experience in the comments.